
Your hiking boots are one of the most important pieces of gear you own. They protect your feet from harmful wildlife and flora, and they prevent you from slipping when you’re on slick surfaces.
They have enough grip to help you scramble up steep parts of your hike and to keep you upright as you head down. Trusting your boots is incredibly important, and it’s difficult to do that if you have heel slippage.
Walking as your heels slips in your hiking boots is incredibly frustrating, distracting, annoying and, worst of all, uncomfortable. It can cause you to trip or slip if you don’t feel steady, and it can also chafe your heel to the point of being red, raw and painful.
It’s also difficult to maintain the pace you want if your heel keeps slipping.
Going uphill is difficult because it feels like your boot won’t stay put when you need to rely on it most, and descents are difficult, too, because your foot will continually slide forward and slam against the hard front of your boot.
Table of Contents
Why Does Heel Slippage Happen?
Heel slippage occurs when there’s too much volume inside the boot at the top of your foot. When your heel isn’t locked in place, it continually slips out of place as you’re hiking.
If you have hiking sneakers or shallow boots, your heel could actually come above the top of the shoe. Or, it may just move out of place and make your foot slide forward or rub your heel up and down against the back of your boot.
How Do I Know if My Heel is Slipping?
First of all, you’ll probably feel it. If you don’t notice a lot of movement, though, you may not realize your heel is slipping as you walk.
A common sign of heel slip is blisters on the back of your heels, especially after a hike that has an ascent. As your heel lifts and rubs against the back of your shoe, it can cause a blister.
Is Heel Slippage a Safety Issue?
Heel slippage is a problem because it’ll slow you down since you need to pay extra attention to what your boots are doing as you hike.
It can also cause a lot of pain and even result in black toenails. Also, if you’re in an emergency situation and have to get somewhere fast, heel slippage will slow you down at the worst possible moment.
10 Ways to Fix Heel Slippage
While your first step to fixing heel slip is ensuring you have the right boots, slippage isn’t always a problem with fit. It’s possible that your boots fit just fine and will actually be incredibly comfortable once you fix the heel slippage problem. Here are 10 ways to fix heel slippage.
1. Make sure your boots fit.
Even though this isn’t 100% the cause of heel slippage, it is the step that makes the most sense to tackle first. When you have hiking boots that fit properly, you have a better chance of eliminating or at least reducing heel slippage.
If you’ve never bought hiking boots before, you won’t know what to look for in a pair of boots. It’s best to go to a specialty store – outdoors stores usually have professionals who can help you find the perfect fit. When I bought my boots, the manager of EMS had me walk up and down an incline and he told me exactly what to feel for to see if the boots fit right.
Here are a few rules of thumb for getting the right fit:
- Shop during the afternoon or later in the day, when your foot is a bit swollen. Your feet are going to swell up a little bit during your hike, so this is the best time of day to try them on.
- Make sure the store clerk measures the length, width and arch of your foot.
- When the boot is still unlaced, push your toes to the front. You should have about ¼-inch of space at the back of the boot, meaning you can slide your finger in. This is the amount of space you want in order to be comfortable going up and down hills.
- Try on five or more pairs of hiking boots.
- Lace the boot while you’re standing, with your full weight on your foot – your foot will change shape when it’s on the ground and weighted, so you don’t want to tie it when there’s no pressure on it.
Lastly, don’t rush through this process! First of all, hiking boots are expensive. Second, they’re very important and can be the difference between having a safe, enjoyable hike and a painful, dangerous one.

2. Know the dimensions of your feet.
We touched on this briefly in the previous tip, but knowing the dimensions of your feet – and of each individual foot – can help you troubleshoot your heel slip problem. Here’s how:
- The width of your feet determines how narrow or wide you need your boots to be. If there isn’t enough room in the front of your shoes, this could contribute to black toenails, which can either worsen the effects of heel slip or make you think you have a heel slip problem when you really don’t.
- If you have a narrow heel, it’s easier to have heel slippage because there isn’t enough boot to hold it in place.
- A lot of people have feet in two different sizes. You may need special accommodations for one of your boots, like an additional insole, to make up for extra space.
Once you know the dimensions of your feet, especially if they’re a bit out of the ordinary, you can search for hiking boot companies that cater specifically to your needs.
Also, look through customer reviews to find out if certain boots run wider or more narrow than normal, which can help you find the perfect fit.
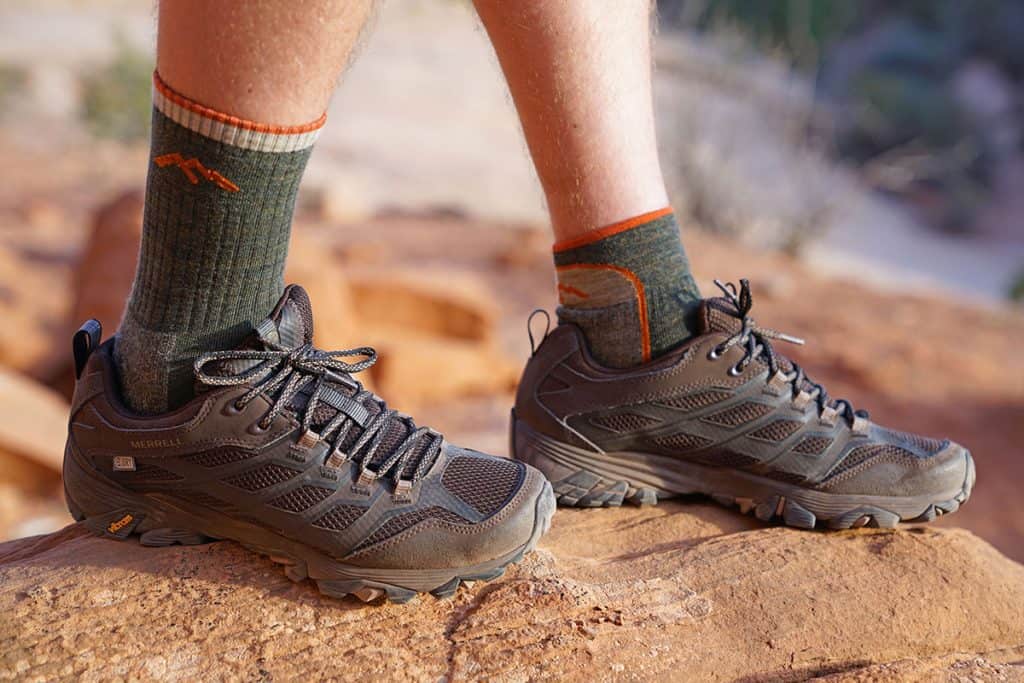
3. Wear different socks
Hiking boots are most comfortable when you wear the right socks with them – hikers usually wear a thin pair of liners topped with thick hiking socks.
Most hiking socks are made of merino wool. If you’re going to be hiking in warm weather, you’ll still wear thick socks, but you can find ones made of lighter, more breathable material so they don’t make you too hot.
If you’re wearing thin socks like you would any other day, there may be too much room left in your boot, causing your foot to move around.
Additionally, cotton socks can lock in moisture instead of wicking it away, and they’ll make you more prone to blisters. This is also why you should try on hiking boots with the proper socks before making a purchase.
When choosing hiking socks, you have to keep a few things in mind:
- Cushioning for both comfort and warmth
- Fabric, which is usually merino wool, possibly with nylon or polyester included
- Fit in order to keep blisters at bay
- Sock height in order to keep your skin protected from your boots
You can find a lot more about choosing the right hiking socks here.
4. Replace or tighten the laces.
It’s possible that your boots fit just fine but that you can’t secure your foot in place because the laces aren’t thick or strong enough. If this is the case, consider replacing the laces with longer or heavy duty ones that you can pull tight.
While your hiking boots should have come with the right laces for your boots, they can get worn down over time. When replacing them, make sure to choose the same shape as the original laces: flat, round or oval.
Or, simply start by tying your laces tighter to see if that makes a difference. I like to pull mine extra tight at the top of the boot, and I’ll stop once or twice during my hike to retie them if I feel them start to loosen.
Since I’ve personally had issues with heel slippage in the past, I’m not afraid to really yank on my laces to lock my foot in – I tie them much tighter than I do regular shoes, and only loosen them up if I feel like they’re causing pain or restricting blood flow (which hasn’t happened more than once or twice).
In general, follows these rules for proper hiking boot lacing:
- The laces should be taut without being too tight
- Laces should be taut along the length of the shoe, from the toe up to the top
- There shouldn’t be any loose lacing or slack in the laces
- Laces should have even, firm contact with the boot

5. Use lace anchors.
This isn’t a permanent fix, and it’s not always a very comfortable one, either, but if you’re in a jam and need a temporary solution, lace anchors could save your feet for the time being. If your laces keep breaking or coming undone, the anchors will keep them in place, and you can remove them when you have a pair of replacement laces.
6. Add a non-slip liner or an insole.
Some hiking boots come with non-slip liners already in them, but if yours don’t seem to have this type of liner, you can buy it separately. You can also add an insole in order to take up some of that extra space in your shoe, like if you have a narrow foot that moves around too much in the boot.
7. Use a “heel lock” tying technique.
A few years ago, after layering on Band-Aids during a painful walk in a pair of hiking boots that would not hold my feet in place, I found this heel lock tying technique, and it’s changed everything.
While I follow a couple other tips on this list simply out of hiking best practices, this is the one-and-only heel slippage fix I’ve ever needed. This technique distributes pressure along the top of your foot to keep your heel in place.
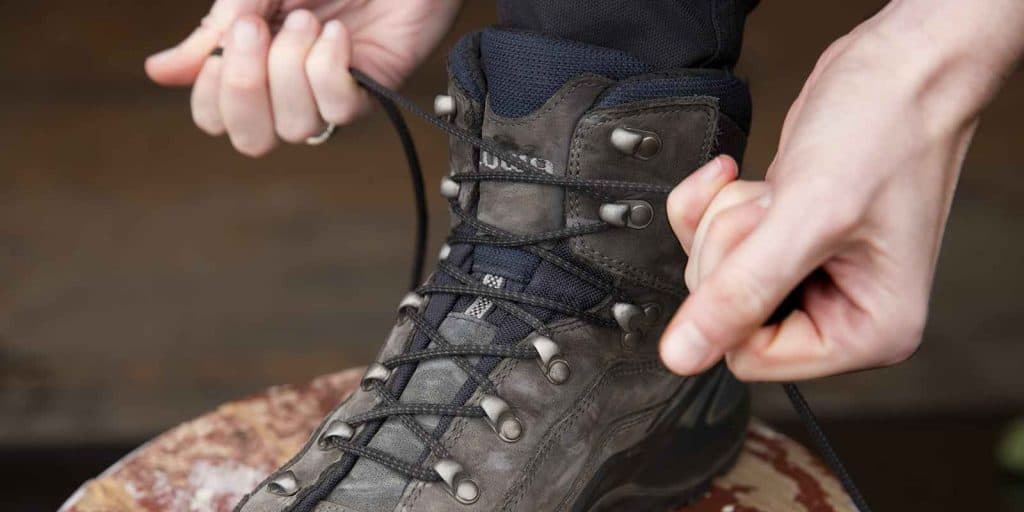
Follow the “Lock Lacing” guide on the bottom left of this chart when tying your boots:
Here are the step-by-step instructions for this technique:
- Lace your boots from the toe up, stopping at the next-to-last eyelet.
- On the same side, lace over and down through the top eyelet. Repeat on the other side.
- Lace through the gap you made on the opposite eyelet. Do this on both sides.
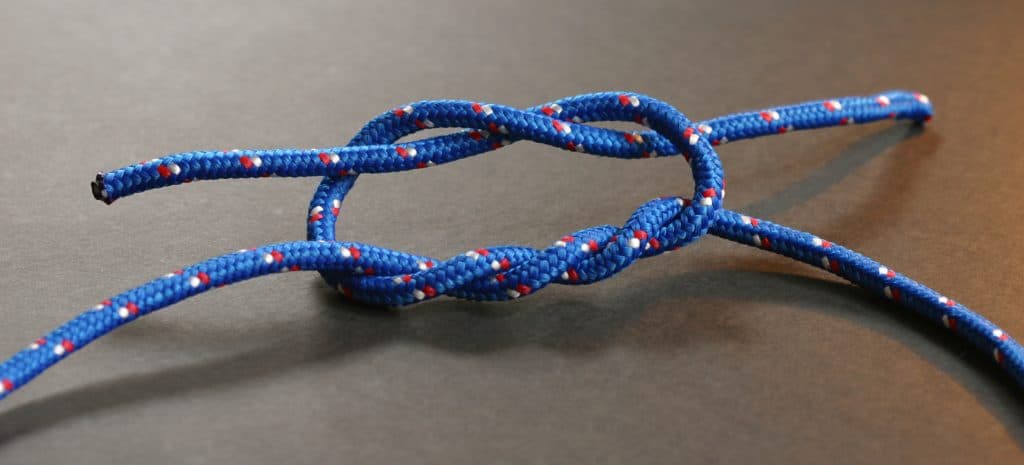
8. Use a Surgeon’s Knot tying technique.
Another tying technique to get rid of heel slip is the Surgeon’s Knot:
Here are the step-by-step instructions for this technique:
- Find the two pairs of eyelets or lace hooks that are nearest to the part of the top of your foot that begins to flex forward (this is likely going to be the top two eyelets).
- Starting on the lower set of eyelets, wrap the laces around each other twice and pull them tight.
- Keeping the laces taut, lace them up on the next hook, maintaining the tension.
- Repeat this process again on the upper set of eyelets, then tie.
9. Add a tongue pad.
If your hiking boots are a little loose up top, consider adding a tongue pad, which can fill in some of that space and create a more snug fit.
By filling in the space where your shoe normally slips forward, a tongue pad may be able to fix the heel slippage problem. Tongue pads are also helpful if all that lace tightening is causing some discomfort.
10. Consider a different type of hiking shoe.
If nothing seems to be working, consider switching to another type of hiking shoe, like a lower boot, a sneaker or trail runners.
Choosing the right type of hiking shoe will have to do with the sort of hiking you do on a regular basis, of course, but if you can be safe in a lower shoe, it may adhere to your fit more snugly, solving the heel slip problem.
If you’re afraid of rolling your ankle, look into techniques for strengthening your ankles so this doesn’t become a hindrance.
Have you dealt with heel slippage in the past? What did you do to fix it?
Recommended Hiking Boots and Socks
Experience out-of the-box comfort with durable leathers, a supportive footbed, and Vibram traction, all in a versatile package, you won't doubt why Moab stands for Mother Of All Boots.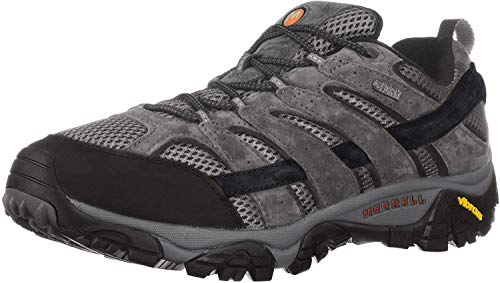
With the lightweight design and comfort of a running shoe, and the support and performance of a hiking boot, the Salomon Outline Mid GTX Hiking Boot gives you the best of both worlds so you can make the most of your time on the trail. 
Amazing durability (darn tough - it's in the name) and easily the best padding I've ever had for a hiking sock. The Quarter Cushion is PERFECT as a low cut and breathable hiking shoe options for warmer conditions.
Amazingly comfortable and more durable than any other socks I've tried, Farm to Feet is my go-to for premium outdoor socks. 100% American Made, 0% substandard materials.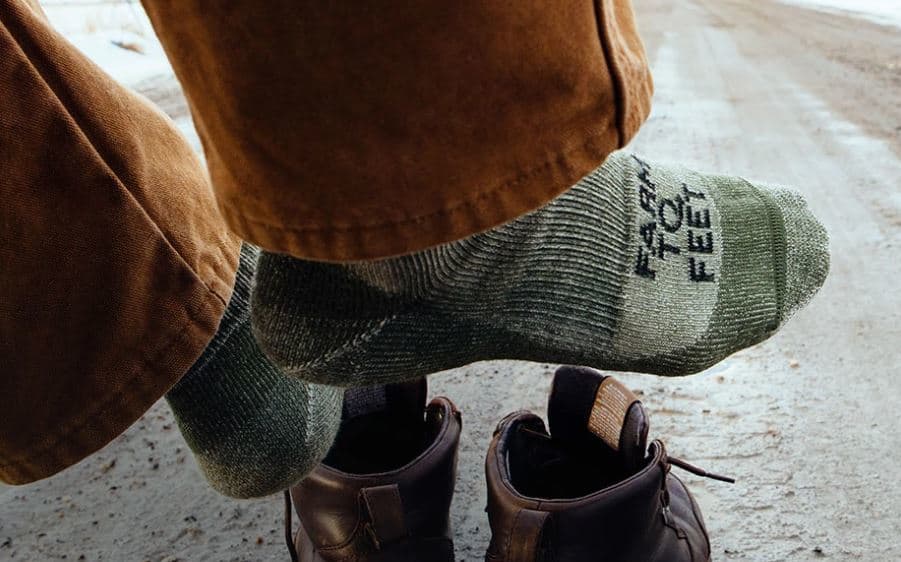
Further Reading on Hiking:
The All-Outdoors Guide team is comprised of enthusiastic experts that enjoy helping others that aspire to be better at outdoor fun. Part of that is making sure you have the right gear and information when it’s time to go out and have fun. Some of our team have accomplished amazing feats like climbing 6000 feet to the top of mountains, others have explored every dirt trail they could find and we even have some people that have backpacked solo on various continents. No matter what our readers want to learn and do, our team is here to help them accomplish those goals.